How to Set Up Language-Specific Thumbnails on YouTube
Published November 19, 2026 (information as of November 2026)
YouTube lets you set a different thumbnail for each language on a single video. The feature is called "localized thumbnails," and YouTube automatically shows each viewer the thumbnail that matches their language setting.
For example, even if your video is in Japanese, viewers in English-speaking countries can see an English thumbnail, and Spanish-speaking viewers can see a Spanish one. Viewers abroad can tell at a glance that the video is for them, which makes this a powerful feature for any channel that wants more clicks from overseas.
This article walks you through the setup in YouTube Studio and the conditions to check before you start.
Before you start
Use YouTube Studio on a computer. You can't set this up in the mobile app.
It works for regular (long-form) videos. Shorts are not supported.
Custom thumbnails must be enabled on your channel. If they aren't yet, verify your phone number in YouTube Studio under Settings → Channel → Feature eligibility.
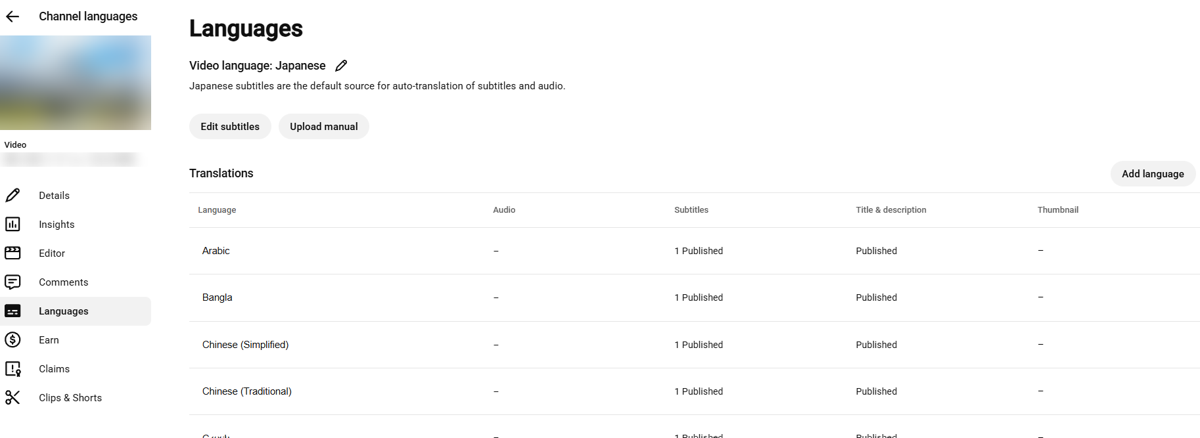
Some channels may not have access yet. The feature is still rolling out. If you see a "Thumbnail" column in the list on the Languages page (step 5 below), your channel can use it.
What to prepare
Prepare one thumbnail image for each language you want to add. We recommend the same size as a regular thumbnail: 1280×720 pixels (16:9).
Your original thumbnail stays as the video's default thumbnail. Language-specific thumbnails are added on top of it, one per language.
Setup steps
Sign in to YouTube Studio on your computer.
From the left menu, select "Content."
Click the video you want to add language-specific thumbnails to.
Under "Thumbnail," upload the default thumbnail (in your original language). If it's already set, you can skip this.
From the left menu, select "Languages." You'll see a list of languages with the columns "Audio," "Subtitles," "Title & description," and "Thumbnail."
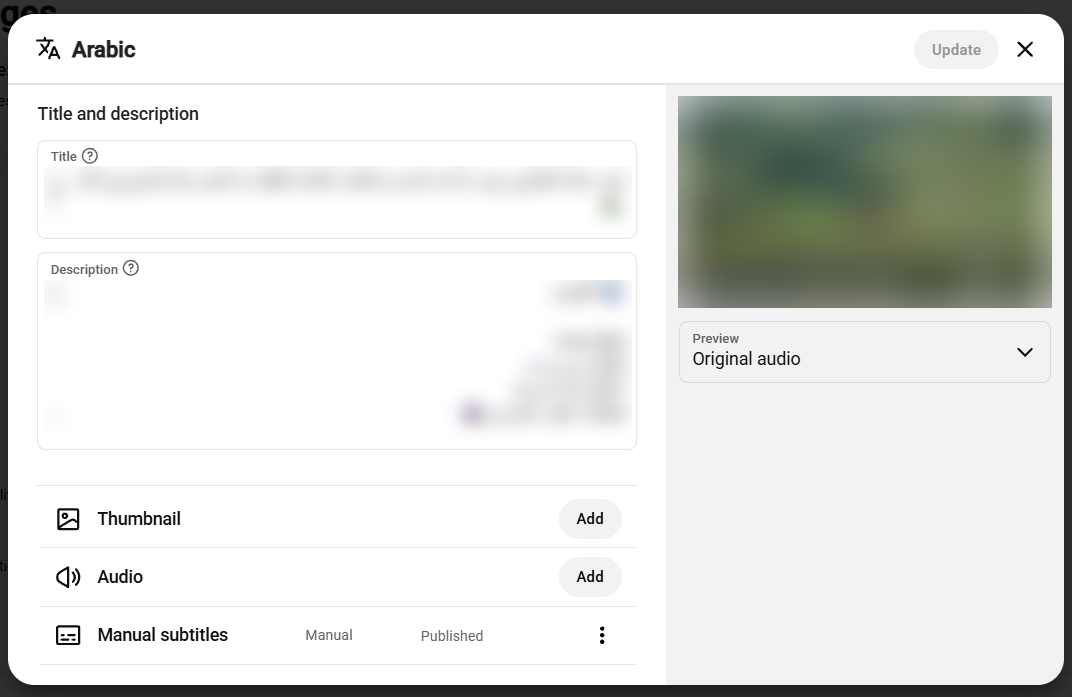
Click the name of the language you want to add a thumbnail for. The editing screen for that language opens. If the language isn't in the list, add it first with "Add language" at the top right.
In the editing screen, below "Title and description," click "Add" next to "Thumbnail" and upload the thumbnail image for that language.
Click "Update" at the top right to save.
Repeat steps 6–8 for each additional language. It may take a little while for the changes to appear.
On the same editing screen, you can also enter the title and description in that language. When you add a language-specific thumbnail, we recommend translating the title and description too. A translated thumbnail with a title still in the original language looks inconsistent to viewers abroad.
Tips for making language-specific thumbnails
Watch the text length. Translated text often gets much longer, especially in languages like German. Rewrite it into a shorter phrase so it fits the original layout.
Use a font that supports the language. Scripts such as Thai, Arabic, and Bengali won't display correctly with a font made for Latin or Japanese text.
Don't use raw machine translation. Thumbnail text is a hook. A phrase that makes local viewers want to click works better than a literal translation.
Start with your biggest audiences. Check which countries and regions your viewers come from in YouTube Studio Analytics, and start with the languages that bring the most viewers.
Create language-specific thumbnails in bulk
With YouTrans, just upload your thumbnail. It reads the text, translates it into up to 30 languages, and generates a thumbnail for each language in one go. It also picks a suitable font for each language automatically.
 YouTrans